Table saws are a type of woodworking tool used to make precise cuts in wood, metal and other materials. They consist of a mostly circular saw blade mounted on an arbor, which is driven by an electric motor. The spinning, blade arbor then protrudes from the surface or front edge of a table, which is used to support the material being cut.
Table saws are commonly used by carpenters, woodworkers, and furniture makers to make a variety of cuts, typically including crosscuts, rip cuts, and angled cuts. They are typically also useful for cutting dadoes, grooves, and other joinery cuts long boards.
One of the primary advantages of table saws is their accuracy and precision. What are Table Saws Used For? The table and blade can be adjusted to make very precise cuts, and the front sliding table saws have provides a stable platform for the material being cut, reducing the risk of errors.
How to Use a Table Saw: Let’s Start With the Types of Saws
There are several types of table saws available, and the type cabinet table saws you choose will depend on your needs and budget. Here are some of the most common types of table saws:
- Contractor saws: These saws are lightweight and portable, making them a good option for job sites or small workshops. They typically have an open base with a motor that hangs off the back, and they can be difficult to adjust.
- Hybrid saws: Hybrid saws combine the best features of cabinet and contractor saws. They are typically heavier and more stable than contractor saws, but not as bulky as cabinet saws.
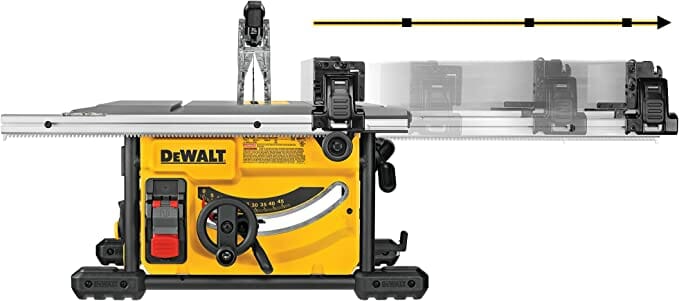
- Cabinet saws: These saws are heavy-duty and designed for professional use. They are more expensive than other types of saws, but they offer high accuracy and stability. Cabinet saws typically have a fully enclosed base, a powerful motor, and a large cast iron table.
- Portable saws: Portable saws are designed for easy transport and storage. They are lightweight and typically have a smaller cutting capacity than other types of saws. Portable saws can be a good option for hobbyists or DIY projects.
Once you have chosen the type of saw that is right for your needs, it’s important to learn how to use it safely and effectively. Always read the manufacturer’s instructions and follow all safety guidelines. Wear appropriate safety gear, keep your workspace clean and free of clutter, and use caution when working with power tools.
How to Use a Table Saw to Make Crosscuts
Crosscuts are cuts made perpendicular to the grain of the wood with circular saw, and they are commonly used on tables, for cutting boards to length or for trimming boards to size. Here are the steps for making crosscuts on tables with a table saw:
- Adjust the blade height: Adjust the height of the blade so that it is just above the height of the wood you want to cut.
- Adjust the miter gauge: Adjust the miter gauge to the desired angle, if necessary.
- Place the wood on the table: Place the wood on the table against the miter gauge, with the end of the wood against the blade.
- Turn on the saw: Turn on the saw and wait for the blade to reach full speed before beginning the cut.
- Make the cut: Slowly push the wood through the blade, using the miter gauge to guide the wood in a straight line. Keep your hands safely away from the blade and use a push stick to guide the wood through the blade if necessary.
- Turn off the saw: Once the cut is complete, turn off the saw and wait for the blade to come to a complete stop before removing the wood or making any adjustments.
Remember to always prioritize safety when using a table saw. Wear appropriate safety gear, maintain a clear workspace, and follow all manufacturer instructions and safety guidelines. With practice and proper technique, you can make accurate and efficient crosscuts on a table saw.
How to Use a Miter Saw to Make Miter Cuts

A miter saw is a versatile tool that can be used to make precise cuts at various angles. Here are the steps for making miter cuts on a miter saw:
- Adjust the blade angle: Adjust the blade angle to the desired angle for the cut. Most miter saws have a range of angles from 0 to 45 degrees.
- Adjust the miter gauge: Adjust the miter gauge to the desired angle for the cut. The miter gauge is usually located at the base of the saw and can be rotated to the desired angle.
- Secure the wood: Secure the wood to the saw’s fence, making sure it is tight against the fence and flat on the table. Use clamps if necessary to hold the wood securely in place.
- Turn on the saw: Turn on the saw and wait for the blade to reach full speed before beginning the cut.
- Make the cut: Slowly lower the saw blade through the wood, using the miter gauge to guide the saw blade in a straight line. Keep your hands safely away from the blade and use a push stick to guide the wood through the blade if necessary.
- Turn off the saw: Once the cut is complete, turn off the saw and wait for the blade to come to a complete stop before removing the wood or making any adjustments.
Remember to always prioritize safety when using a miter saw. Wear appropriate safety gear, maintain a clear workspace, and follow all manufacturer instructions and safety guidelines. With practice and proper technique, you can make accurate and efficient miter cuts on a miter saw.
BENEFITS OF HAVING A HIGH-QUALITY TABLE SAW BLADE
A high-quality table top cabinet saws and dado blade can provide numerous benefits to woodworkers and other users of table saws and dado blades. Some of the key benefits of a router table top cabinet saws dado blade include:
- Improved accuracy and precision: A high-quality table saw blade can produce cleaner, more precise cuts with less tearing or chipping of the material being cut. This can be especially important when working with expensive or delicate materials, or when making intricate cuts.
- Faster cutting speeds: A blade with sharp teeth and a smooth, clean-cutting edge can make faster and more efficient cuts, reducing the time required to complete a project.
- Longer blade life: A high-quality blade can last longer than a lower-quality one, reducing the need for frequent blade changes and saving money in the long run.
- Reduced noise and vibration: Blades with special coatings or design features can reduce noise and vibration, making the cutting process more comfortable and less fatiguing.
- Versatility: Some high-quality table saw blades are designed to cut a variety of materials, such as wood, plastic, and metal, making them a versatile option for woodworkers and other professionals.
Top 7 Safety Rules to Follow When Using a Table Saw
Absolutely! Safety should always be the top priority when using any power tool, including table saws. Here are some important safety tips to keep in mind when using a table saw:
- Wear appropriate safety gear: This includes eye protection, ear protection, and any other gear recommended by the manufacturer.
- Keep the workspace clear: Make sure there are no obstacles in the path of the saw blade, and that the workspace is clean and organized.
- Use the blade guard: Always use the blade guard to help prevent accidents and injuries.
- Adjust the blade height: Set the blade height so that it is just above the material being cut. This can help prevent kickback and other accidents.
- Use a push stick: When cutting narrow or small pieces of material, use a push stick to help keep your hands safely away from the blade.
- Use the fence: Make sure the fence is properly adjusted and securely in place before making any cuts.
- Turn off the saw when not in use: When making adjustments or changing blades, always turn off the saw and unplug it from the power source.
By following these table top safety tips and using common sense, you can help prevent accidents and injuries when using a table top saw.
Making the Cuts
When making cuts with a table saw, it’s important to follow best practices to ensure accuracy and safety. Here are most table saws and some tips for making the cuts:
- Choose the right blade: Use the appropriate blade for the material you are cutting. Different blades are designed for different materials and cuts.
- Adjust the blade height: Adjust the blade height so that it is just above the material being cut. This can help prevent kickback and other accidents.
- Use the fence: The fence is used to guide the material being cut. Make sure it is properly adjusted and securely in place before making any cuts.
- Use a push stick: When cutting narrow or small pieces of material, use a push stick to help keep your hands safely away from the blade.
- Make a test cut: Before making your final cut, make a test cut on a scrap piece of material to ensure that the blade is properly adjusted and the cut is accurate.
- Take your time: Rushing can lead to mistakes and accidents. Take your time and make slow, deliberate cuts.
- Turn off the saw when not in use: When making adjustments or changing blades, always turn off the saw and unplug it from the power source.
By following these tips, you can help ensure that your cuts are accurate and safe when using a table saw blade. Remember to always prioritize safety when using table saw cutter working with power tools.
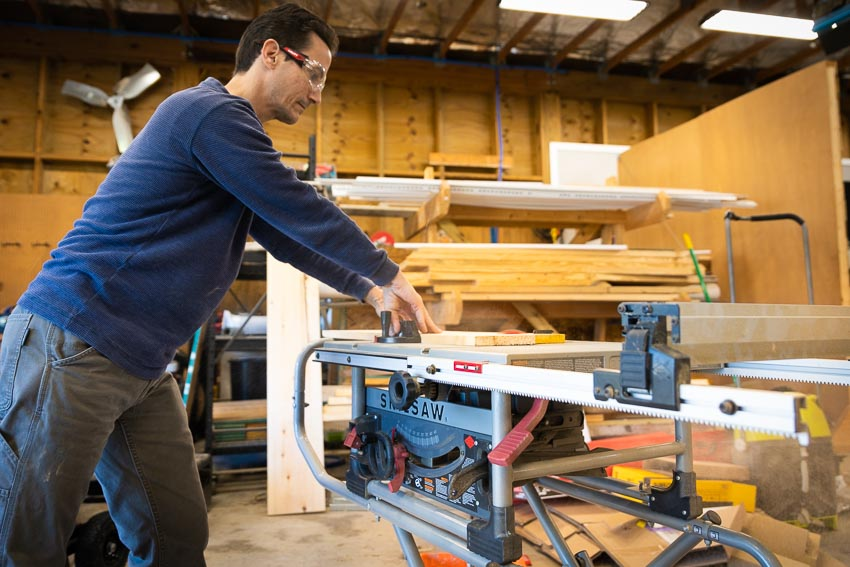
How to Rip

Ripping is the process of cutting a piece of material lengthwise, a straight cut parallel to the wood’s grain. Here are the steps to rip material using a table saw:
- Set up the saw: Make sure the blade is appropriate for the material you are cutting and that the blade is properly adjusted and secured.
- Adjust the fence: Move the fence so that it is parallel to the blade and positioned at the desired distance from the blade to make the desired width of the cut.
- Adjust the blade height: Adjust the blade height so that it is just above the material being cut.
- Wear safety gear: Always wear safety glasses, ear protection, and other safety gear recommended by the manufacturer.
- Turn on the saw: Turn on the saw and wait for the blade to reach full speed before making the cut.
- Start the cut: Place the material against the fence and push it into the blade. Make sure the material is being pushed through the saw smoothly and that the blade is cutting straight through the material.
- Keep hands away from the blade: Always use a push stick to keep your hands a safe distance away from the blade.
- Finish the cut: When you reach the end of the cut, turn off the saw and remove the cut material from the saw.
- Clean up: Remove any debris from the saw and the work area.
Remember to always prioritize safety when working with power tools, including table saws.
Master the info and techniques here to ensure safe, efficient, satisfying work with this popular power tool
Absolutely! Table saws are a versatile and powerful tool many woodworkers, but they can also be dangerous if not used properly. By mastering the information and techniques related to table saws, you can ensure safe, efficient, and satisfying work with this popular power tool.
Here are some key areas to focus on:
- Safety: Always prioritize safety when working with a table saw. Wear appropriate safety gear, use the blade guard, adjust the blade height properly, and use a push stick to keep your hands safely away from the blade.
- Blade selection: Choose the appropriate blade for the material you are cutting. Different blades are designed for different materials and cuts.
- Blade maintenance: Keep your saw blades sharp and clean to ensure accurate and efficient cuts.
- Fence adjustment: The fence is used to guide the material being cut. Make sure it is properly adjusted and securely in place before making any cuts.
- Technique: Take your time and make slow, deliberate cuts. Use a test cut to ensure that the blade is properly adjusted and the cut is accurate.
By mastering these key areas, you can help ensure safe and efficient use of a table saw, and produce satisfying results over a decade with this popular power tool.
8 Safety Rules on How to Use a Table Saw
Here are 8 important safety rules to follow when using a table saw:
- Wear appropriate safety gear: This includes eye protection, ear protection, and any other gear recommended by the manufacturer.
- Keep the workspace clear: Make sure there are no obstacles in the path of the saw blade, and that the workspace is clean and organized.
- Use the blade guard: Always use the blade guard to help prevent accidents and injuries.
- Adjust the blade height: Set the blade height so that it is just above the material being cut. This can help prevent kickback and other accidents.
- Use a push stick: When cutting narrow or small pieces of material, use a push stick to help keep your hands safely away from the blade.
- Use the fence: Make sure the fence is properly adjusted and securely in place before making any cuts.
- Turn off the saw when not in use: When making adjustments or changing blades, always turn off the saw and unplug it from the power source.
- Keep your focus on the task: Do not use a table saw when you are tired, distracted, or under the influence of drugs or alcohol. Always keep your focus on the task at hand.
By following these safety rules, you can help prevent accidents and injuries when using dangerous tools such a table saw. Remember that safety should always be the top priority when working with power tools.
Using the Table Saw Controls
To use a table saw, you need to understand and know how to operate its controls. Here are the basic steps for using the table saw controls:
- Power on the saw: Turn on the power switch of the table saw, and make sure the blade is properly adjusted and secured.
- Adjust the blade height: Adjust the blade height so that it is just above the material you are going to cut. This will ensure clean and efficient cuts.
- Adjust the angle of the blade (if necessary): Some table saws have an adjustable blade angle for making angled cuts. If you need to make an angled cut, adjust the angle of the blade to the desired angle before making the cut.
- Adjust the fence: The fence is used to guide the material being cut. Move the fence so that it is parallel to the blade and positioned at the desired distance from the blade to make the desired width of the cut.
- Use the miter gauge (if necessary): The miter gauge is used to make angled cuts, such as when cutting molding or trim. Set the miter gauge to the desired angle and securely attach it to the table saw.
- Start the saw: Once the saw and the material are properly set up, turn on the saw and wait for the blade to reach full speed before making the cut.
- Make the cut: Carefully guide the material into the blade, using the fence or miter gauge to keep it straight and steady. Use a push stick to keep your hands safely away from the blade.
- Turn off the saw: Once the cut is complete, turn off the saw and wait for the blade to come to a complete stop before removing the material or making any adjustments.
By following these steps, you can use the controls on a table saw safely and effectively to make accurate cuts.
Using a Table Saw for Cutting Wood
Table saws are an excellent tool for cutting wood, but it’s important to use the right techniques to make most saws ensure accurate and safe cuts. Here are some steps for using a table saw to cut wood:
- Choose the right blade: Select a blade that is designed for cutting wood. There are many types of blades available for different wood-cutting tasks, such as ripping, cross-cutting, and more.
- Adjust the blade height: Adjust the blade height so that it is just above the wood you are going to cut. Make sure the blade is securely fastened in place.
- Adjust the fence: The fence is used to guide the wood being cut. Move the fence so that it is parallel to the blade and positioned at the desired distance from the blade to make the desired width of the cut.
- Use a push stick: When cutting narrow or small pieces of wood, use a push stick to help keep your hands safely away from the blade.
- Turn on the saw: Once the saw and the wood are properly set up, turn on the saw and wait for the blade to reach full speed before making the cut.
- Make the cut: Carefully guide the wood into the blade, using the fence to keep it straight and steady. Use a push stick to keep your hands safely away from the blade.
- Turn off the saw: Once the cut is complete, turn off the saw and wait for the blade to come to a complete stop before removing the wood or making any adjustments.
Remember, safety is always the top priority when working with power tools like a table saw. Be sure to wear appropriate safety gear, keep your focus on the task at hand, and follow all manufacturer instructions and safety guidelines. With the right techniques and precautions, a table saw can be a powerful and efficient tool for cutting wood.
How to Make Rip Cuts
Rip cuts are straight cuts made along the length of the edge of a board, and they are one of the most common types of cuts made on a table saw. Here are the steps for making a rip cut on a table saw:
- Adjust the blade height: Adjust the height of the blade so that it is just above the height of the wood you want to cut.
- Adjust the fence: Adjust the fence so that it is parallel to the blade and positioned at the desired distance from the blade to make the desired width of the cut.
- Turn on the saw: Turn on the saw and wait for the blade to reach full speed before beginning the cut.
- Start the cut: Place the wood against the fence and guide it into the blade, making sure to keep your hands safely away from the blade. Push the wood through the blade, keeping it flat against the table and against the fence.
- Complete the cut: Continue pushing the wood through the blade until the cut is complete. Use a push stick to guide the wood through the blade as it approaches the end of the cut, making sure to keep your hands safely away from the blade.
- Turn off the saw: Once the cut is complete, turn off the saw and wait for the blade to come to a complete stop before removing the wood or making any adjustments.
Remember to always prioritize safety when using a table saw. Wear appropriate safety gear, maintain a clear workspace, and follow all table saw manufacturer instructions and safety guidelines. With practice and proper technique, you can make accurate and efficient rip cuts on a table saw.
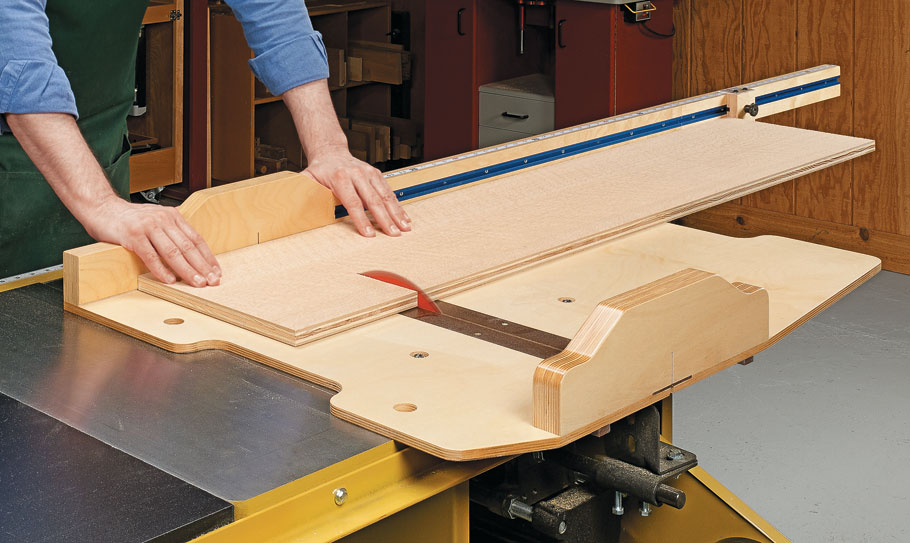
Tips and Techniques for Safely Cutting Sheet Goods on a Table Saw
Sheet goods refer to large, flat materials such as plywood, particle board, or more commonly called MDF. Cutting sheet goods on a table saw can be challenging because they are often too large to be handled by one person and a circular table saw’s rip fence itself can be difficult to maneuver. Here are some tips for cutting sheet goods on a table saw:
- Measure and mark the material: Use a straightedge or measuring tape to measure and mark the material where you want to make the cut.
- Support the material: Use sawhorses or another type of support to hold the sheet material securely in place while you make the cut. Make sure the material is level and won’t shift during the cut.
- Use an outfeed support: An outfeed support, such as a roller stand or a sawhorse, can help support the material as it exits the saw, preventing it from falling and potentially causing injury.
- Use a guide: A guide can help you make straight, accurate cuts on large sheet goods. You can use a straightedge or clamp a piece of wood to the sheet material to guide the saw blade.
- Use a slow, steady feed rate: When cutting sheet goods, it’s important to use a slow, steady feed rate to avoid binding or kickback.
- Use a sharp blade: A sharp blade will make cleaner cuts and reduce the risk of kickback.
Remember to always prioritize safety when cutting sheet goods on a table saw. Wear appropriate safety gear, maintain a clear workspace, and follow all manufacturer instructions and safety guidelines. With practice and proper technique, you can make accurate and efficient cuts on large sheet goods.
Choosing the Right Table Saw Cutter for Your Woodworking Project
When it comes to woodworking, choosing the right table saw blade cutter can make all the difference in the quality of your cuts. Here are some factors to consider when selecting a table saw blade cutter for your project:
- Blade size: The size of your table saw blade cutter will depend on the size of your saw. Be sure to choose a blade that is compatible with your saw.
- Blade teeth: The number of teeth on the blade will determine the type of cut you can make. Blades with more teeth are ideal for making fine, precise cuts, while blades with fewer teeth are better for rough cuts.
- Blade material: Table saw blades are typically made from carbide or high-speed steel. Carbide blades are more durable and long-lasting, while high-speed steel blades are more affordable.
- Blade type: There are different types of table saw blades, including rip blades, crosscut blades, and combination blades. Rip blades are designed for making long cuts along the grain of the wood, while crosscut blades are better for cutting across the grain. Combination blades are versatile and can be used for both types of cuts.
- Tooth configuration: The tooth configuration of the blade will determine the quality of the cut. Alternate top bevel (ATB) blades are the most common type and are ideal for making clean, precise cuts. Flat top (FT) blades are best for ripping cuts.
FAQS
- Is a table saw safe to use?
A: While a table saw is a powerful and useful tool, it can also be dangerous if not used properly. It’s important to follow all safety guidelines and wear appropriate safety gear, such as eye protection and head and ear protection. Always keep your head, hands and fingers away from the blade, and never reach over the blade or behind the fence.
- What types of cuts can I make with a table saw?
A table saw can be used to make a variety of cuts, including rip cuts, crosscuts, bevel cuts, and even miter cut top cuts. The type of cut you can make with table extension will depend on the blade and the accessories you have available.
- How do I choose the right blade for my project?
When choosing a blade for your project, consider the type of cut you need to make, the material you will be cutting, and the thickness of the material. Blades with more teeth are better for making fine, precise cuts, while blades with fewer teeth are better for rough cuts.
- What safety gear should I wear when using a table saw?
At a minimum, you should wear eye protection and ear protection when using a table saw. It’s also a good idea to wear a dust mask to protect your lungs from sawdust. Avoid wearing loose clothing or jewelry that could get caught in the blade.
- How do I maintain my table saw?
To keep your table saw in good working condition, you should regularly clean it and oil the moving parts. Check the blade for signs of wear or damage and replace it as needed. Keep the table saw blade guard in place and use a push stick or other safety devices to keep your hands away from the blade.
Conculusion
A table saw is a powerful and versatile tool that can make woodworking projects easier and more efficient. However, it’s important to always prioritize safety when using a table saw. Follow all manufacturer instructions and safety guidelines, wear appropriate safety gear, and never use a table saw if you are feeling tired or distracted. By taking the time to choose the right blade for your project, learning how to make different types of cuts, and maintaining your table saw, you can create high-quality woodworking projects with ease and confidence.