How to install Ryobi circular saw blade – we have 10 steps to solve this problem. A circular saw is like a superhero tool, easily cutting wood, metal, and plastic. But with time, its blade gets dull or damaged. That’s when you might need to replace it with a shiny new Ryobi circular saw blade.
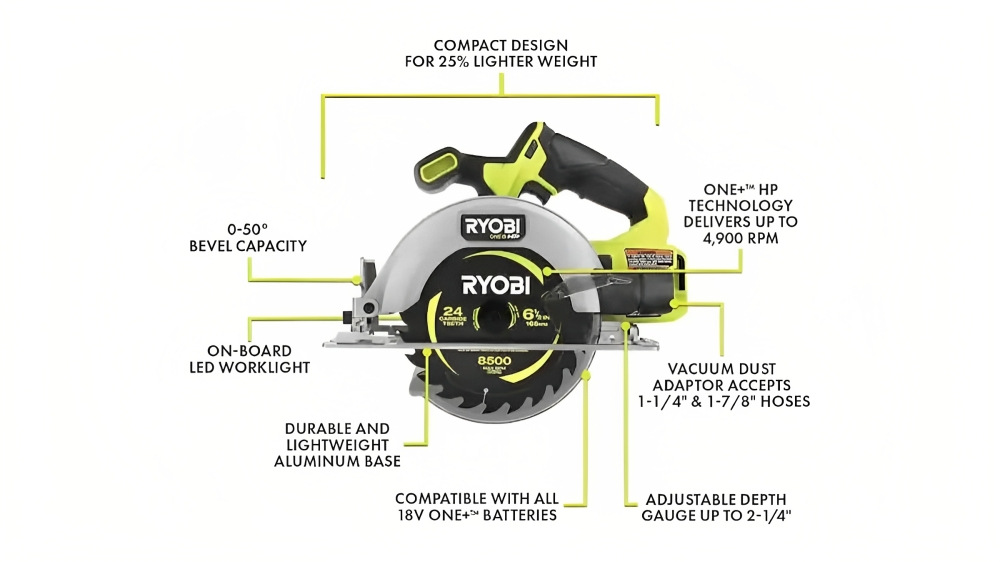
Ryobi, the power tool champs, have a range of saws and blades for all your cutting needs. Need smooth cuts? They got a fine-toothed blade. How about fast cuts? No worries, a coarse-toothed blade has your back. Metal or concrete cutting? Ryobi’s got a specialty blade for that too.
Now, let’s get to the fun part—how to install Ryobi circular saw blade. Don’t fret & it’s not rocket science. In fact, you can do it in just 10 easy steps with basic tools. Ready to learn how? Let’s dive in and make your saw happy!
What You Will Need
Before you begin, make sure you’ve got everything ready to install your Ryobi circular saw blade. Here’s what you’ll need:
- A Ryobi circular saw.
- A new Ryobi circular saw blade that fits your saw and project.
- A wrench (use the one that came with your saw or a standard one).
- A hammer or punch (optional, only if your saw has a diamond-shaped arbor).
- A clean cloth.
- A scrap piece of wood.
10 Step-By-Step Guide On How To Install Ryobi Circular Saw Blade:
Welcome to our excellent guide on installing a Ryobi circular saw blade! If you’ve got a Ryobi circular saw or are planning to grab one, you must know how to put on a new blade the right way.
Don’t worry & we’ll make it super easy for you! A well-installed blade means smoother cuts and a longer-lasting saw. So, let’s jump right in & get this show on the road!
Step 1: Unplug the Saw or Remove the Battery

First things first, ensure your saw isn’t connected to any power source. Safety first! If it’s corded, unplug it from the wall or extension cord. For cordless ones, take out the battery. This way, we avoid accidents & keep the saw safe from any damage.
Step 2: Set the Blade to the Highest Position
Alright, now let’s get your saw ready. First, find the shoe – the flat horizontal guard at the bottom of the saw. It sits on your workpiece, so we need to adjust it. Unlock the lever on the back of the shoe & push it down as far as it can go.
Great! Now lock it back into place with the lever. This will lift the blade above the shoe, giving you more space to work with.
Step 3: Press and Hold the Spindle-Lock Button
Now let’s make sure the blade doesn’t spin while we remove it. To do this, find the spindle-lock button on your saw. It’s a lever located behind the top guard covering the blade. Press and hold it until you feel a click. That means the locking mechanism is activated, and the blade won’t move.
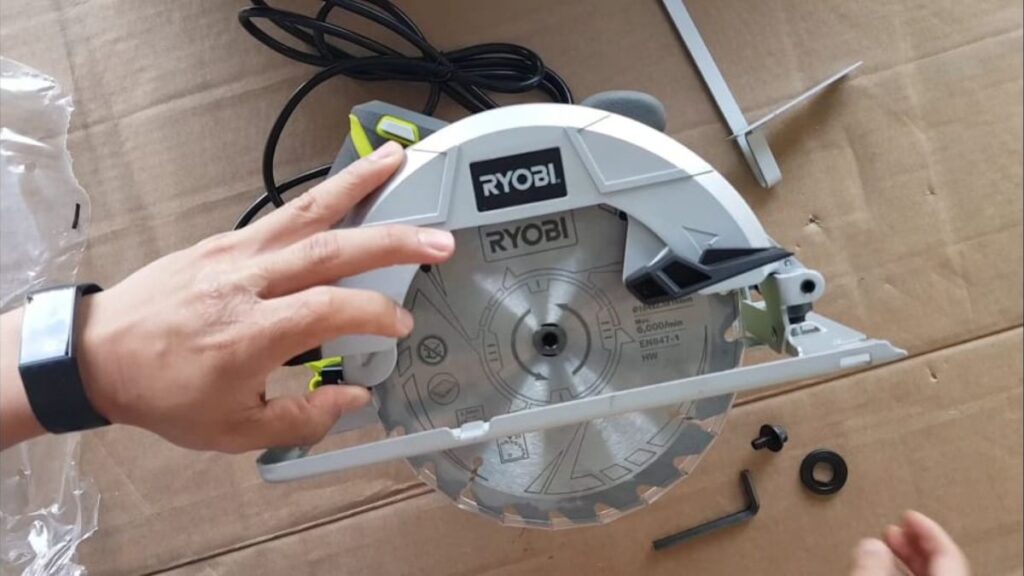
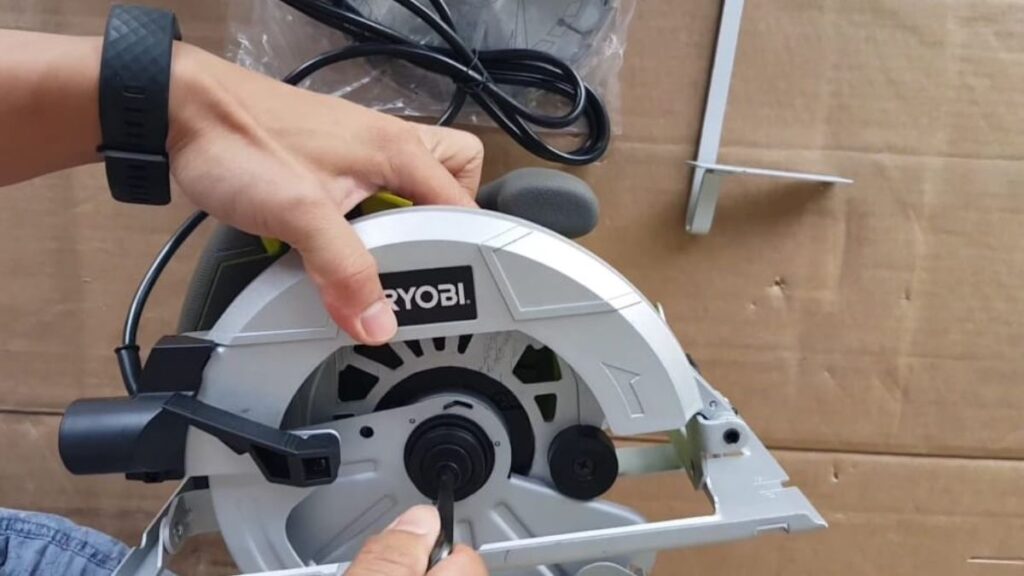
Step 4: Unscrew the Spindle Nut and Washer

It’s time to loosen and remove the spindle nut and washer that keep the blade in place. The spindle nut is that center bolt right in the middle of the blade, and the washer is the flat metal ring beneath it.
To unscrew them, grab your wrench. Most circular saws come with a blade wrench that fits perfectly. You’ll find it either slotted into the shoe or tucked into the main body of the saw. Don’t worry if you don’t have one; a standard wrench that fits the nut will do.
And to loosen the nut, turn the wrench in the same direction as the arrow on the blade or the saw’s guard. It’s usually counterclockwise, but check your saw’s model to be sure. Once the nut is loose, simply pull it off, along with the washer, and put them somewhere safe.
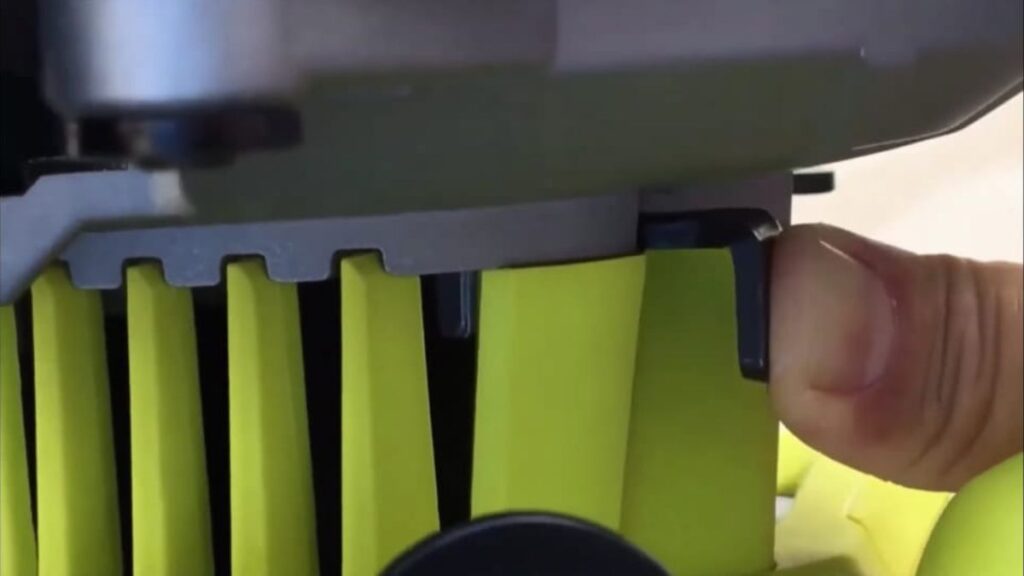
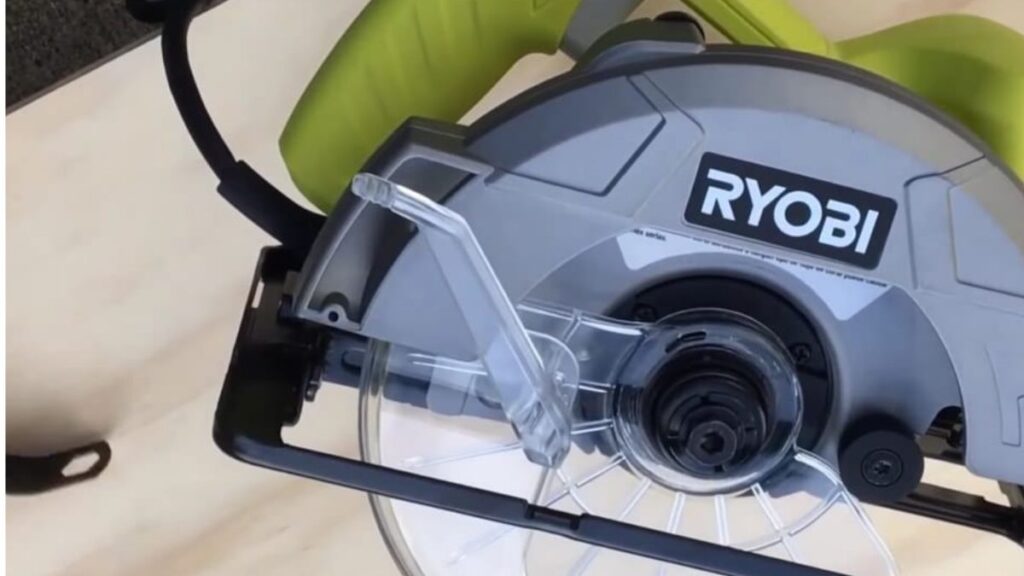
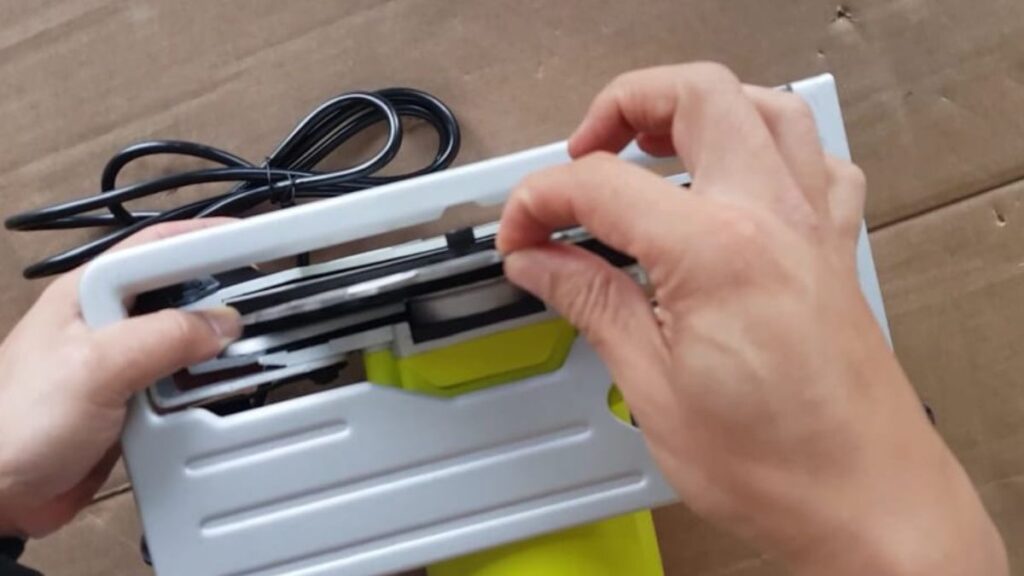
Step 5: Remove the Old Blade
Time to replace your saw blade. To get started, retract the lower blade guard covering the bottom of the blade. Simply pull up on the lever at the end of the guard. Great! Now, gently lift the bottom of the blade and slide it out from the saw.
Remember, those edges are sharp! So, be careful not to touch them. If you want extra protection, just wear a pair of leather work gloves. Safety first!
Step 6: Clean the Inside of the Saw’s Blade Guard
Before you pop in a new blade, make sure to give the saw some love by cleaning out any sawdust or debris that might be hanging around inside the blade guard or near the spindle. Just grab a clean cloth, wipe away any dirt or dust, and your saw will perform like a champ!
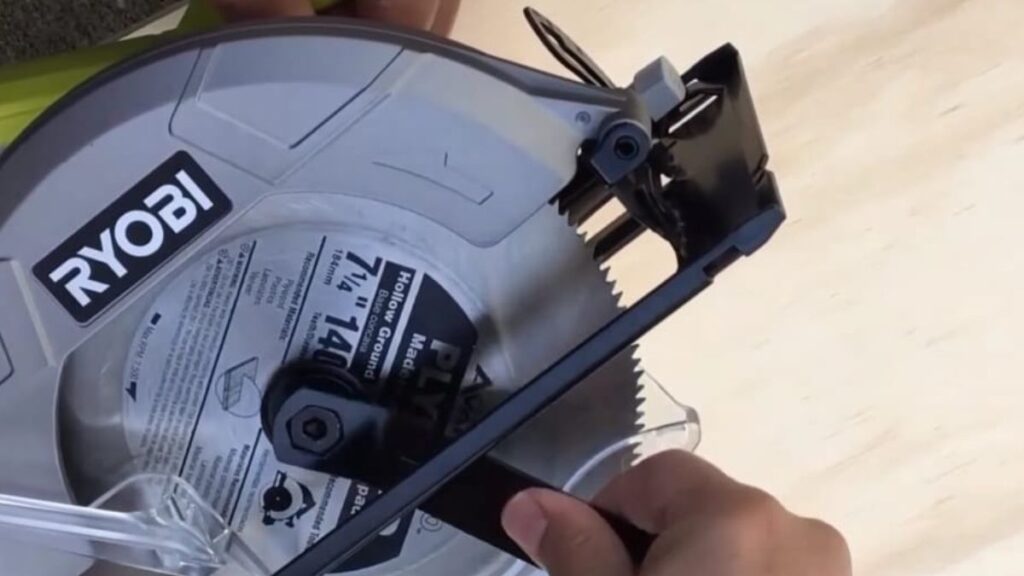
Step 7: Remove the Knockout from the Blade if Needed
Did you know some circular saws have an excellent diamond-shaped hole in the center of the blade instead of the regular round one?
It’s called the arbor, and it fits onto the spindle. But here’s the thing – if your saw has this diamond-shaped arbor, you’ll need to remove a tiny piece of metal from your new blade called a knockout.
The knockout is like a little round insert that fills the corners of the diamond hole. To get rid of it, grab a hammer or punch and place your new blade over two wood blocks.
Make sure one corner of the hole is exposed. Then give it a gentle tap with the hammer or punch, and guess what? You should hear a satisfying ‘pop’ when it comes out.
Step 8: Install the New Blade
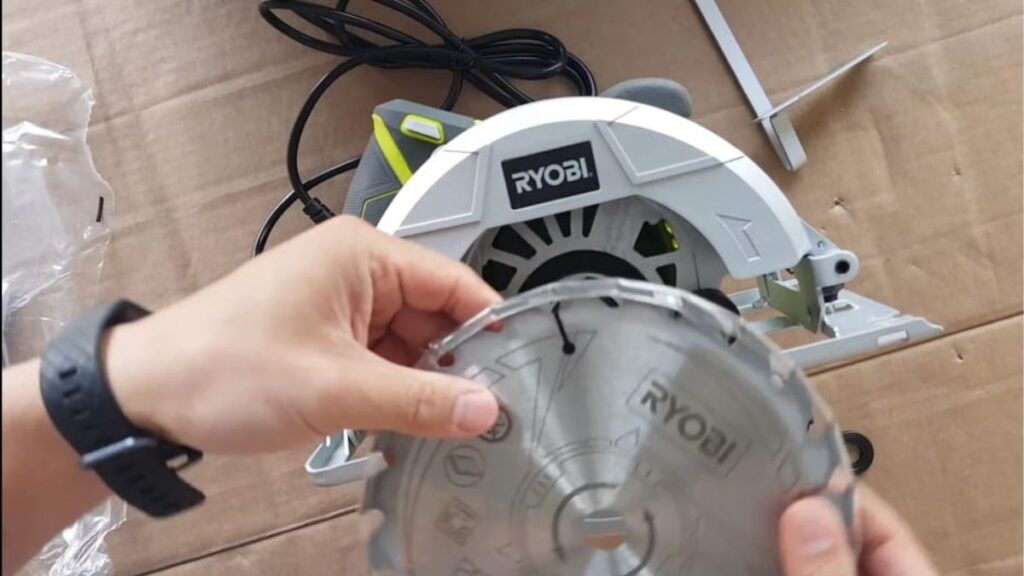
Alright, you’re all set to install your brand new Ryobi circular saw blade. Here’s what you gotta do:
1. Align the blade with the spindle and arbor of your saw.
2. Lift the lower blade guard and slide the new blade onto the spindle.
3. Check that the arrow on the blade matches the arrow on the saw’s guard. They should point in the same direction, showing the blade’s rotation direction.
Step 9: Tighten the Spindle Nut and Washer
Now let’s secure the new blade with the spindle nut and washer. Remember, these are the parts we removed earlier. Get the wrench ready.
Hold down the spindle-lock button again, just like before. Use the wrench to tighten the nut & washer onto the spindle. Turn the wrench in the opposite direction of the arrow on the blade or saw’s guard. Usually, it’s clockwise, but it might be different for your saw.
Keep tightening until the nut and washer feel snug, but avoid over-tightening them. If you do, they’ll be tough to loosen next time. That’s it! You’ve secured the new blade properly.
Step 10: Test the Saw
Awesome work on getting that Ryobi circular saw blade set up! Now, it’s time to put it to the test & make sure it’s working like a charm.
Go ahead, plug it back in, and lower that blade guard. Ready? Grab a scrap piece of wood and let’s make a test cut. See how smoothly and accurately that bad boy slices through.
Looking good? High five! Your Ryobi circular saw blade is locked and loaded for action. Time to tackle your next project like a pro.
Conclusion
Hope you like our article on how to install ryobi circular saw blade. Installing a Ryobi circular saw blade is a breeze with these 10 simple steps: unplug or remove the battery, set the blade high, press and hold the spindle-lock button, unscrew the nut and washer, remove the old blade, clean the blade guard, take out the knockout if needed, install the new blade, tighten the nut and washer, and test the saw. If You Want Buy The Best circular saw under 100 $– A budget-friendly guide So Please Check Here
In minutes, you’ll have a sharp blade for your project. Remember these safety tips: wear protective gear, avoid touching the blade, use a clamp for straight cuts, support your workpiece, and keep the saw clean. Happy cutting!