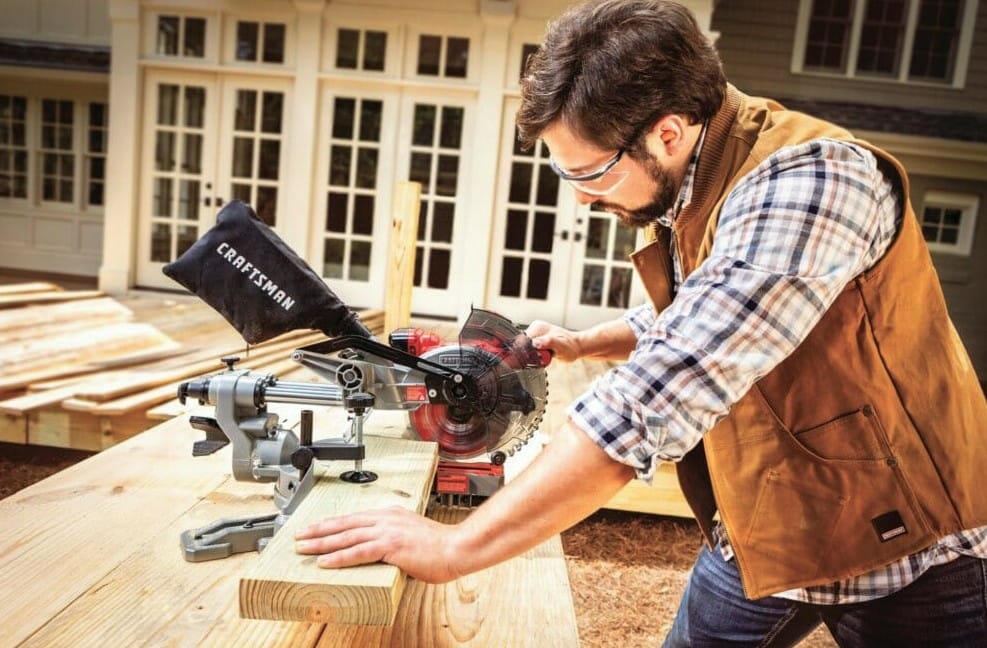
Unlocking how to unlock a craftsman miter saw. Craftsman miter saw is an essential step before you can start using it for your woodworking projects. Fortunately, the unlocking process how to unlock a craftsman miter table saw is simple and straightforward. Here are five easy steps to unlock your Craftsman miter saw.
First, locate the locking pin or knob at the back of the saw.
Second, loosen the locking pin or knob by turning it counterclockwise.
Third, lift the saw arm and pivot it to the desired angle.
Fourth, tighten the locking pin or knob by turning it clockwise until it is secure. Finally, check the saw’s angle and adjust it if necessary. Following these
five steps will allow you to quickly and easily unlock your Craftsman, miter saw or table saw and begin your woodworking projects.
Unlocking the Head

How to Unlock Miter Saw with 5 Simple Steps?
- Locate the locking knob: The locking knob is usually located at the back of the saw, near the pivot point of the blade.
- Loosen the locking knob: Turn the locking knob counterclockwise to loosen it. This will release the tension on the head and allow you to adjust the angle of the blade.
- Adjust the head: With the locking knob loose, you can now adjust the angle of the blade to the desired position. Make sure the angle markings on the base and head are aligned for accuracy.
- Tighten the locking knob: Once you have set the blade to the desired angle, turn the locking knob clockwise to tighten it. Make sure the knob is tight enough to hold the head securely in place.
- Check the angle: Finally, check the angle of the blade by using a square or other measuring tool to ensure accuracy. If necessary, repeat the steps to make any adjustments to the angle.
Why should you unlock a Craftsman miter saw?
Unlocking a Craftsman miter saw is necessary if you want to adjust the angle of the , how to unlock a craftsman miter saw and blade. The locking mechanism on the craftsman miter saw and head is designed to keep the blade securely in place while you make precise cuts at a specific angle. However, if you want to change the angle of the blade to make a different type of cut, you must first unlock the lock pins the craftsman miter saw head. By following the steps to unlock the head, you can adjust the angle of the blade to make the precise cuts you need for your project. It is important to always lock the head again once you have made your adjustments to ensure that the blade is secure and safe to use.
Angle Locks
Angle locks are a mechanism found on miter saws that allow you to lock the miter saw’s blade at a specific angle. This mechanism is typically located on the back of the blade guard the front unlock a miter saw near the pivot point of the blade. Angle locks are essential for making accurate and precise cuts, as they ensure that the blade craftsman miter saw remains in the correct position throughout the cut.
Unlocking the Angle
To unlock the angle on a full miter saw blade, follow these steps:
- Locate the angle lock: The angle lock is usually located on the back of the saw near the pivot point of the blade. It may be a knob or lever that you need to turn or slide.
- Loosen the angle lock: Turn the angle lock counterclockwise or slide it to release the lock on the blade.
- Adjust the angle: With the angle lock released, you can adjust the angle of the blade to the desired position. Make sure to align the angle markings on the saw base and head to ensure accuracy.
- Tighten the angle lock: Once you have set the blade to the desired angle, turn the angle lock clockwise or slide it back to tighten it. Make sure the lock is tight enough to hold the blade securely in place.
- Check the angle: Finally, check the angle of the blade with a square or other measuring tool to ensure accuracy. If necessary, repeat the steps to make any adjustments to the angle.
By following these steps, you can unlock a miter saw and the angle on your miter saw and adjust it depending based on past activity and your settings to make precise cuts for your project. Remember to always first lock down the angle back into place before using the to unlock a miter saw to ensure your safety and accuracy of your cuts.
Swivel lock
The swivel lock is a mechanism found on some miter saws that allows you to lock the miter saw’s head in a fixed position, preventing it from swiveling. This can be useful when making repetitive cuts at a specific angle or when using the craftsman hand miter saw to make straight cuts.
To engage the swivel lock, follow these steps:
- Locate the swivel lock: The swivel lock is typically located on the back of the saw near the pivot point of the head.
- Engage the swivel lock: To engage the swivel lock, turn the locking knob or lever to tighten the lock and prevent the head from swiveling.
- Make your cuts: With the swivel lock engaged, you can make your cuts with the saw head locked in place.
- Disengage the swivel lock: When you are finished making your cuts and need to adjust the angle of the blade, disengage the swivel lock by turning the locking knob or releasing the lever.
Unlock the Table
To unlock the table on a miter saw, follow these steps:
- Locate the table lock: The table lock is usually located on the side or front of the saw near the table.
- Loosen the table lock: Turn the table lock counterclockwise or release the lever to unlock the table.
- Adjust the table: With the table unlocked, you can adjust it to the desired position. You can typically slide the table back and forth or pivot it to make adjustments.
- Tighten the table lock: Once you have set the table to the desired position, turn the table lock clockwise or press the lever to lock the table back into place.
- Check the table: Finally, check the table to ensure it is locked securely in place before using the saw.
Locate the Lock Pin
The lock pin on a old craftsman miter saw is a small metal pin that is used to lock the saw blade in place when changing the blade or making other adjustments. The location of the lock pin craftsman miter see can vary depending on the specific model of the craftsman miter saw, but it is typically located near the blade or on the motor housing.
- Turn off and unplug the saw: Before locating the lock pin, always make sure the saw is turned off and unplugged to avoid any accidents.
- Check the blade area: Look near the saw blade for a small metal pin or button that protrudes from the saw body.
- Check the motor housing: If you don’t see the lock pin near the blade, check the motor housing or handle area for the lock pin.
- Check the manual: If you are unable to locate the lock pin on your own, refer to the saw’s user manual for more information.
Step:1- Find the lock pin locks
To find the lock pin, depending on your settings for a miter saw, follow these steps:
- Turn off and unplug the saw: Before locating the lock pin, always make sure the saw is turned off and unplugged to avoid any accidents.
- Look near the blade: The lock pin is typically located near the blade on the saw body. It may be a small metal pin or button that protrudes from the saw body.
- Check the motor housing: If you don’t see the lock pin near the blade, check the motor housing or handle area for the lock pin.
- Check the manual: If you are unable to locate the lock pin on your own, refer to the saw’s user manual for more information
Find the Lock Pin Location
The location protected position of the lock pin on a miter saw can vary depending on the specific model of the saw, but it is typically located near the blade or on the motor housing. To find the lock pin location based on general location of your miter saw, follow these steps:
- Turn off and unplug the saw: Before locating the lock pin, always make sure the saw is turned off and unplugged to avoid any accidents.
- Look near the blade: The lock pin is typically located near the blade on the saw body. It may be a small metal pin or button that protrudes from the saw body. Check both sides of the blade to locate the pin.
- Check the motor housing: If you don’t see the lock pin near the blade, check the motor housing or handle area for the lock pin. It may be located near the trigger or handle of the saw.
- Consult the user manual: If you are still unable to locate the lock pin, consult the user manual for your specific miter saw. The manual should have information on the location of the lock pin and how to use it.
Safety Measures!
Working with a miter saw can be dangerous if proper safety measures are not taken. Here are some safety measures to keep in mind when using a miter saw:
- Read the user manual: Before using the miter saw, carefully read the user manual to understand the safety precautions and proper operating procedures.
- Wear personal protective equipment: Wear eye and ear protection, gloves, and a dust mask to protect yourself from flying debris and noise.
- Keep the work area clean: Make sure the work area is free from clutter, debris, and other objects that may interfere with the saw or cause accidents.
- Keep hands and fingers away from the blade: Always keep your hands and fingers away from the blade and use clamps or other tools to hold the workpiece in place.
- Use the safety guard: Make sure the safety guard is properly installed and in place before using the saw.
- Do not remove safety devices: Do not remove any safety devices or guards from the saw, and do not disable any safety features.
- Do not rush the job: Take your time when making cuts and do not rush the job. Rushing can lead to accidents and mistakes.
- Disconnect the power: Always disconnect the power to the saw when changing blades, making adjustments, or cleaning the saw.
Unlock the blade
Unlocking the blade on a miter saw is a necessary task when changing or adjusting the blade. However, it is important to follow proper safety procedures to prevent accidents or injury. Before unlocking the blade sliding compound to unlock a miter saw to cut – see, always make sure the saw is turned off and unplugged,
- Turn off and unplug the saw: Before unlocking the blade, always make sure the saw is turned off and unplugged to avoid any accidents.
- Locate the lock pin: The lock pin is typically located near the blade on the saw body. It may be a small metal pin or button that protrudes from the saw body. Pull the lock pin out to unlock the blade.
- Hold the blade guard: While unlocking the blade, hold the blade guard to prevent it from closing on your hand.
- Raise the blade: With the lock pin removed, use the blade release lever or handle to raise the blade to its highest position.
- Remove the blade: Once the blade is raised to its highest position, you can remove the blade by unscrewing the blade bolt and washer. Make sure to carefully remove the blade and set it aside in a safe place.
- Replace or adjust the blade: With the old blade removed, you can replace it with a new one or adjust it as needed.
- Secure the blade: Once the blade has been replaced or adjusted, use the blade bolt and washer to secure the blade in place.
- Lower the blade: Lower the blade to its original position and push the lock pin back in to lock the blade in place.
FAQS
Why do I need to unlock the blade on my miter saw?
You need to unlock the blade on your miter saw in order to change or adjust the blade, which may be necessary for different cutting applications or to replace a worn or damaged blade.
How do I know where the lock pin is located on my miter saw?
The location of the lock pin can vary depending on the specific model of your miter saw. Consult the saw’s manual or manufacturer’s website for more specific information on the location of the lock pin.
How do I unlock the head of my miter saw?
To unlock the head of your miter saw, locate the lock pin near the pivot point of the blade, and remove the pin by pulling it out. This will allow you to raise the miter handle or lower the saw head as needed.
Can I adjust the angle of my miter saw blade?
Yes, you can adjust the angle of your miter saw blade by loosening the angle lock knob and adjusting the angle using the angle adjustment scale on the front sliding compound miter saw. Make sure to tighten the knob securely after adjusting the angle.
What safety precautions should I take when unlocking my miter saw?
Always make sure the saw is turned off and unplugged before unlocking any part of the saw. Use caution when handling the blade and guard, and wear appropriate personal protective equipment, such as safety glasses and gloves.
Conculusion
unlocking a Craftsman miter saw is a simple process that can be accomplished in just a few steps. By following these five steps – locating the locking pin or knob, loosening the locking pin or knob, lifting the saw arm and pivoting it to the desired angle, tightening the locking pin or knob, and checking the saw’s angle and adjusting if necessary – you can quickly and easily unlock your used craftsman miter saw and start using it for your woodworking projects. With the saw head unlocked, you can pivot it to the angle that suits your needs, whether it’s for crosscutting, miter cutting, or bevel cutting. Remember to always take proper safety precautions when using power tools like miter saws to avoid injury.